I think most of you probably already know how to make twine pom poms. This tutorial is a just-in-case. Aaand I wanted to make some pom poms.
So, this is what you need: Twine. Fork. Scissors. That's it. Grab your materials...
And now choose which colour you'd like to use for your pom poms. You can use one colour, two colours, three, four - However many you like! For this pom pom, I'm using two - Jewel and Felicity. Take your twine and wrap it around your fork.
Like so.
And now wrap, wrap, wrap your twine around and around and around and around - I tend to wrap the twine about 50 times, depending on how many colours I'm using.
And cut.
Now, for the purpose of this tutorial, I'm going to use a different colour to tie the twine together.
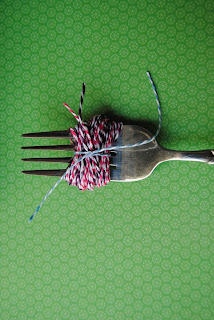
Cut a small length of twine. Use this twine to tie a tight knot around the middle of the
wrapped-twine-on-the-fork...
Like so.
{At this point, I'd dearly like to know how to turn that photo around, and why it turned itself around in the first place, but I'll move on...}
Push your twine off your fork, and you should have a cute little bundle like this:
Now take your scissors, and cut through the loops on each end.
Just like that.
Now, squash that little sucker between your fingers...
... Grab your scissors and cut, cut, cut! Trim all the way around, squashing it in several directions to make sure you get it all nice and round-ish. This next photo is after I've finished trimming:
Not as scraggly anymore. :)
Then fluff, fluff, FLUFF your pom pom! Get your fingers in there and push, pull, prod and poke until you're quite satisfied that you have, indeed, made yourself a little twine pom pom.
Congratulations!
And one more photo, since Lorelai was so desperate to help me today.
Love.
May the twine be with you,
Angie. xx


Angie!! Super cute pom poms!! I love them....but then I love your twine...totally addicted to twine...<3 ~Kimi~ xx
ReplyDeleteThank you Kimi! I hope you give the pom poms a go. :)
Delete